
The plastic injection molding process is one of the most important manufacturing techniques in today’s plastics industry. This technology enables the production of complex shapes, small details, high dimensional accuracy, and stable quality. By melting plastic pellets, injecting the melt into a mold under high pressure, and maintaining key parameters throughout the cycle, injection molding meets mass-production needs at optimal cost.
Modern injection molding lines run on closed, automated systems that reduce errors and boost efficiency. Below, Thai Duong Plastics details the five main phases of an injection-molding cycle along with the technical factors that require tight control:
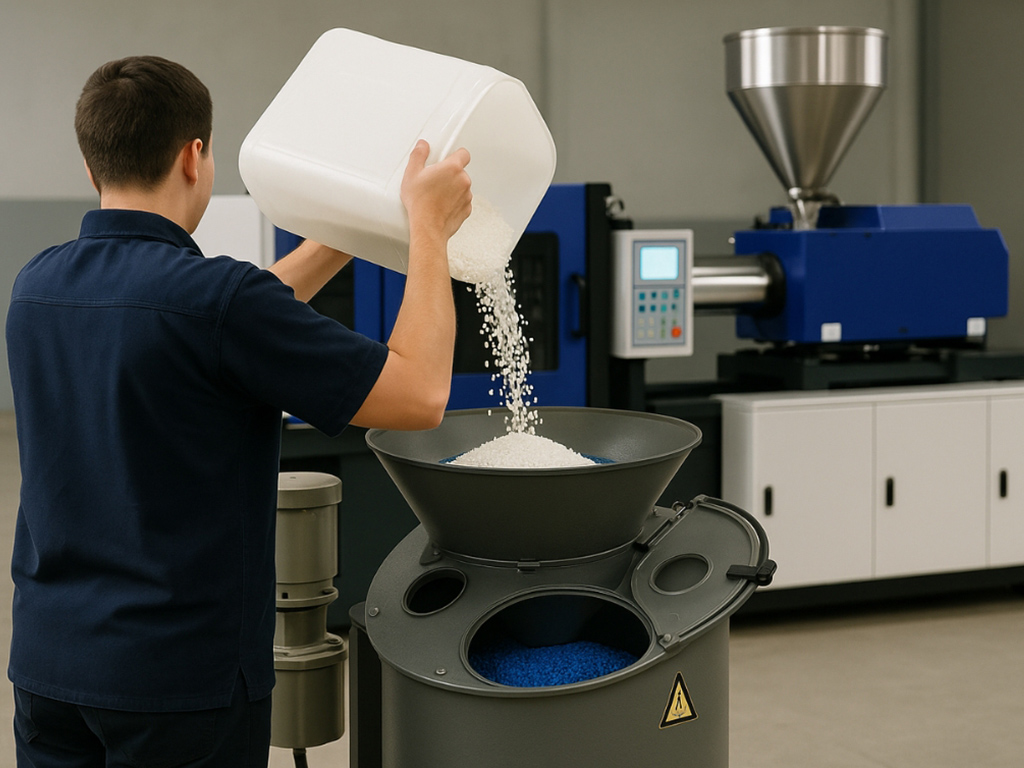
Stage 1: Handling and preparing injection-molding resin
Thermoplastic pellets such as PP, PE, ABS, PC, and PA are commonly used. Before entering the machine, pellets must be dried to remove moisture-the culprit behind defects like voids, splay, cracks, and reduced mechanical properties.
At this step, you may request the addition of additives (colorants, antistatic agents, strength enhancers, etc.). It’s critical that additives be uniformly blended in a dedicated mixer to ensure consistency. After preparation, the material is loaded into the hopper, ready for the next stage.
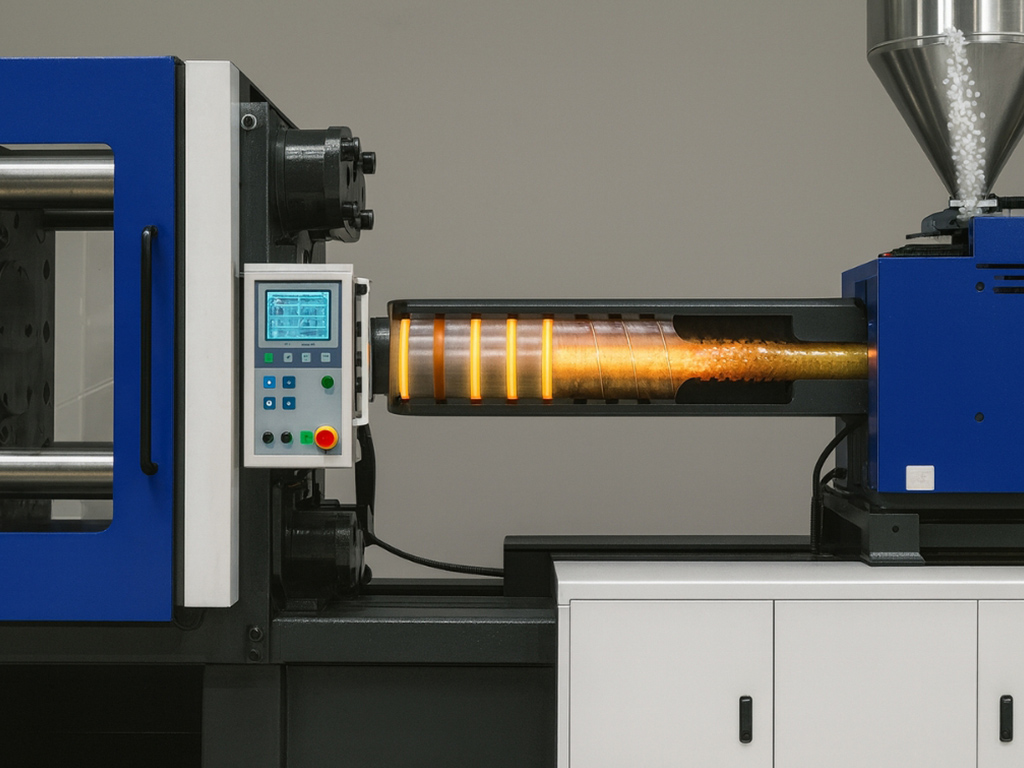
Stage 2: Plasticizing in the screw barrel
Pellets descend into the barrel, where a rotating screw conveys, compresses, and mixes the material as it advances. The barrel is divided into multiple heating zones so the plastic melts progressively along its length without overheating or localized burning.
Meanwhile, the screw’s rotation generates shear heat and thoroughly mixes the melt and additives, producing a more uniform flow. The molten plastic then accumulates in front of the screw, reaching a stable, viscoelastic state ready for the next step-injecting into the mold.
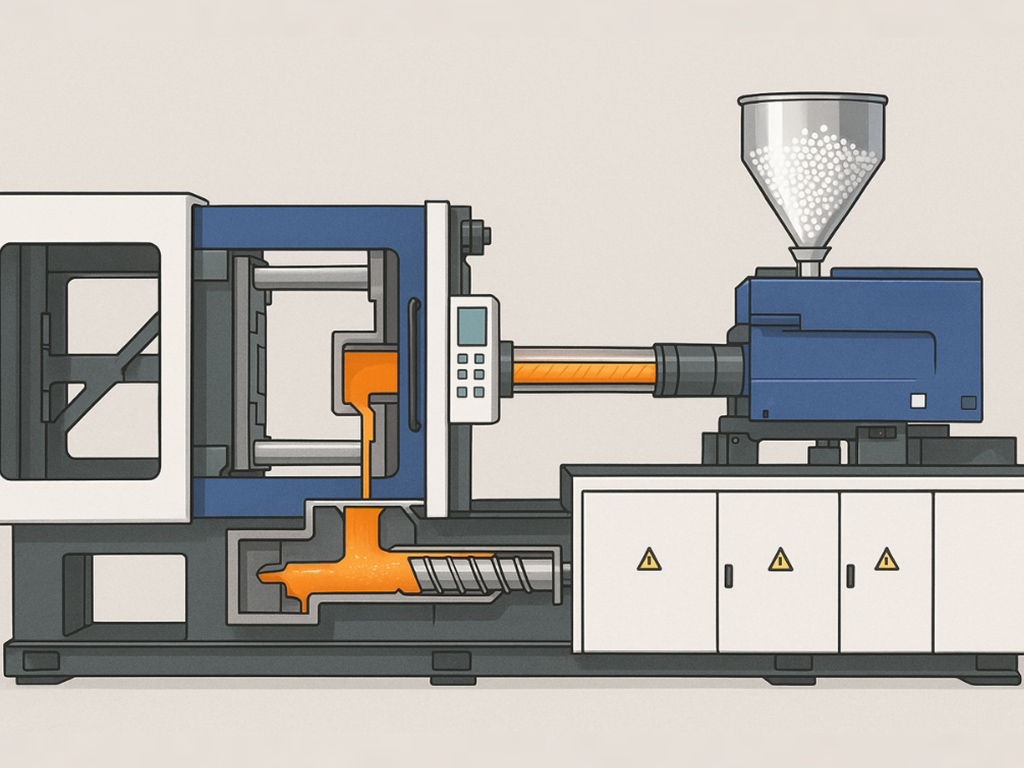
Stage 3: Injecting the molten plastic into the mold
Once the mold is clamped, the screw advances like a piston, pushing the melt into the cavity. Under high pressure, the plastic fills thin walls, small features, and complex geometries.
Injection speed and pressure must be precisely tuned. Too fast and trapped air can cause burn marks or weld lines; too slow and the plastic may freeze before the cavity is completely filled. Runner and gate design also plays a crucial role in distributing the melt evenly and minimizing defects.
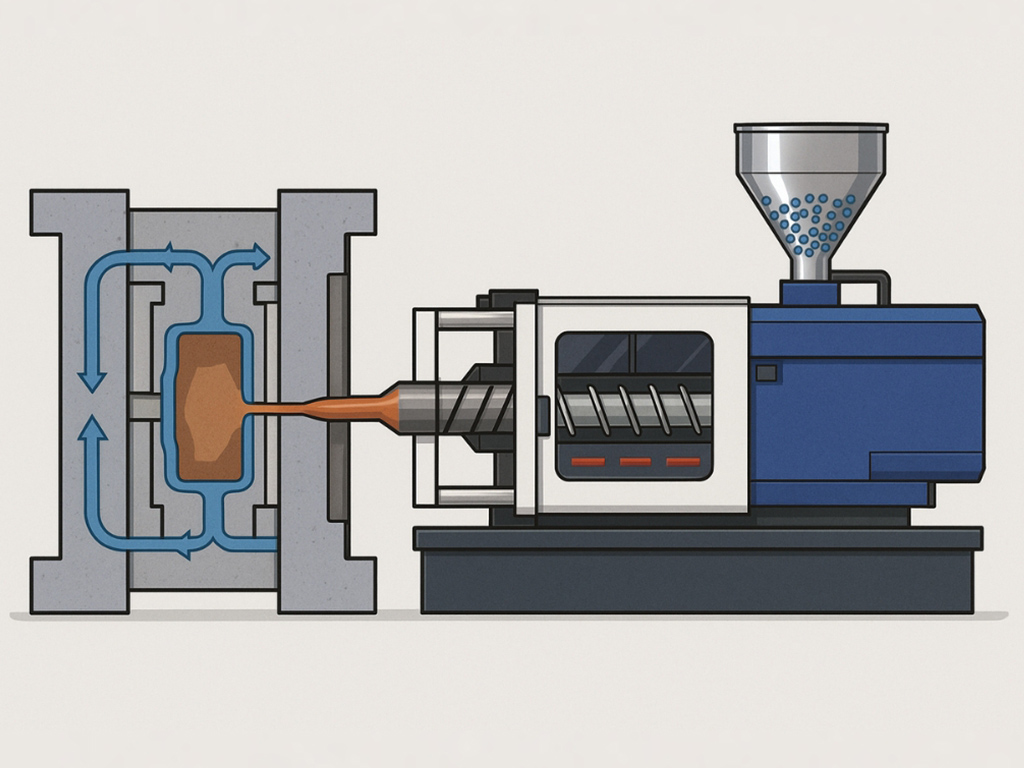
Stage 4: Packing/holding and cooling to stabilize the part
After the cavity is full, the machine maintains pressure to compensate for shrinkage during solidification. This stage determines the part’s completeness and dimensional integrity.
A water- or oil-circulated cooling system extracts heat from the part. Cooling time is typically the longest portion of the cycle and depends on wall thickness, resin type, and the efficiency of the cooling-channel design. Uneven cooling can lead to warpage or distortion.
Stage 5: Part ejection
When the part has sufficiently solidified, the mold opens automatically and the ejection system-ejector pins, plates, or a pick-and-place robot-removes the part. This action must be fast and accurate without scratching surfaces or deforming features.
The mold then closes and a new cycle begins. Depending on requirements, secondary operations-deflashing, strength testing, labeling, assembly, etc.-are performed before final packaging.

See also: What is plastic molding? Process, advantages, and the latest applications
Operational notes for injection molding
For an efficient process, closely control the factors below:
- Barrel temperature profile: Directly governs melt flow, determining fill capability and reducing short shots.
- Injection and holding pressures: Insufficient pressure can cause sinks or voids; excessive pressure may damage the mold and induce residual stresses.
- Cooling time: Poorly set cooling leads to uneven shrinkage, impacting dimensions and part stability.
- Mold design: Precision machining, proper runner/gate layout, and effective venting reduce defects during production.
- Material quality: Low-grade or improperly conditioned resin increases risks of bubbles, warpage, and brittleness.
With its five core technical stages, injection molding is an optimal production method in the plastics industry. Tight control of every parameter at each stage helps improve throughput, ensure consistent product quality, and minimize manufacturing costs. If you need consultation or high-quality industrial injection-molding solutions, please contact us for prompt, professional support.